ModeShape also has several useful Eclipse plugins:
-
A file editor for JSR-283 Compact Node Definition (CND) files
-
A publishing tool for use with ModeShape servers
These do not come with the normal ModeShape distribution, but are installed as Eclipse features using our Eclipse update site.
Compact Node Definition (CND) editor
The ModeShape Tools Java Content Repository (JCR) Compact Node Type Definition (CND) Editor is a 2-page editor for *.cnd files. The first page is a form-based view of the CND file and the second page is a readonly source view.
The CND editor can be used to edit CND files for any JCR 2.0 implementation and is not limited to ModeShape users. It even can be installed separately from the ModeShape-specific features.
Here is what the CND Editor looks like:

The CND Editor's form page consists of the following sections:
-
a header section, which displays error messages and a link to open the CND preference page,
-
a namespaces section, which displays and allows editing of the namespace mappings defined in the CND, and
-
a node types section, which displays and allows editing of the node type definitions defined in the CND.
Header Section
The header section contains a hyperlink that, when activated, opens the CND notation preference page. Also, if the CND being edited has validation errors, the header section will have another hyperlink that identifies the total number of validation errors found. Clicking the errors hyperlink opens a dialog that lists the specific validation errors and provides a way to export those validation messages to a file.
Here is what the header section will look like when the CND has one validation error:

Namespaces Section
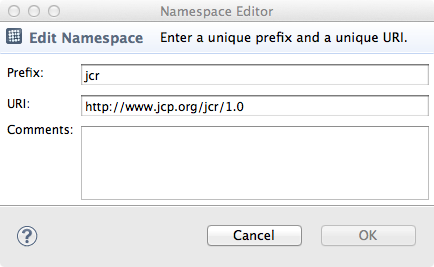
The namespaces section is a collapseable area used to create and maintain the namespace mappings declared in the CND file. A namespace mapping consists of a unique prefix, a unique URI, and an optional comment. Namespace mappings can be copied and pasted within the same CND editor or between different CND editors. The namespace section looks like this:

Namespace mappings are editing using the Namespace Editor show here:
Node Types Section
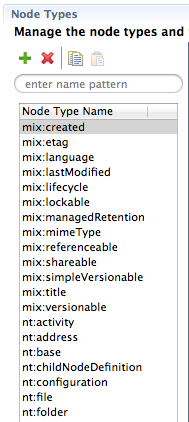
The node types section is used to create and maintain the node type definitions declared in the CND file. The node types section consists of, along the left-side, a table containing all the declared node type definitions, and a node type name filter box which allows the user to limit the number of node type definitions being displayed. The node type table can be used to delete a selected node type. Also, node type definitions can be copied and pasted within the same CND editor or between different CND editors.
The node type table, with the name filter on top, looks like this:
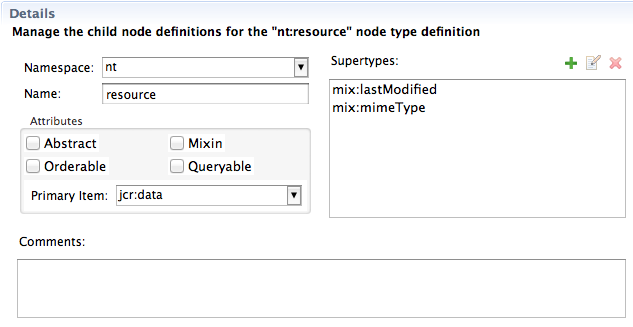
The right-side of the node types section consists of a details area, as well as, collapseable areas for property and child node definitions. When a node type definition is selected, it's corresponding information is used to populate the details, properties, and child nodes areas. The details area is used to edit a node type's namespace, name, supertypes, attributes, and an optional comment.
The node type details area looks like this:
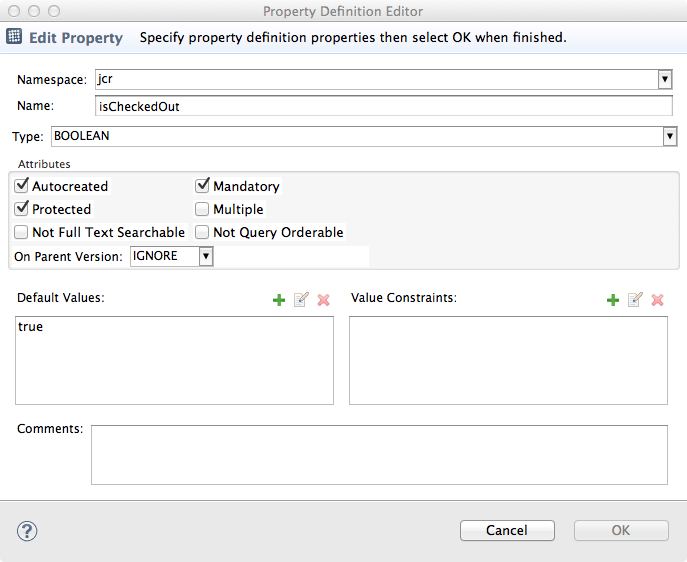
A node type definition can contain zero or more property definitions. When the properties area is expanded, the following table will show the declared property definitions for the selected node type definition:
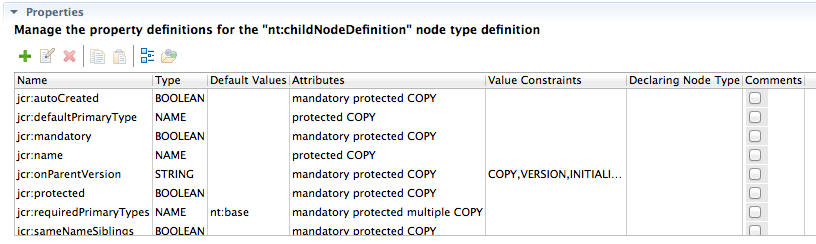
The properties table can be used to delete a selected property definition and can optionally show inherited properties. Property definitions can be copied and pasted within the same CND editor or between different CND editors. A property definition can be created or edited using the Property Definition Editor shown here:
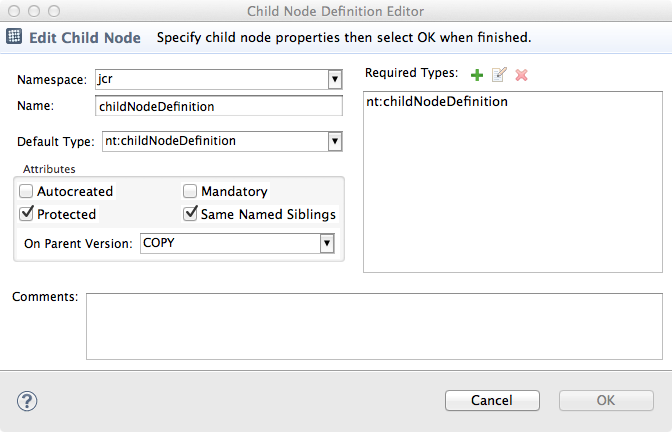
A node type definition can contain zero or more child node definitions. When the child nodes area is expanded, the following table will show the declared child node definitions for the selected node type definition:
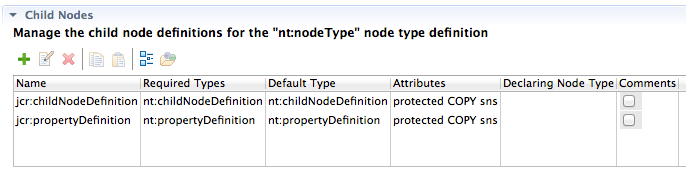
The child nodes table can be used to delete a selected child node definition and can optionally show inherited child nodes. Child node definitions can be copied and pasted within the same CND editor or between different CND editors. A child node definition can be created or edited using the Child Node Definition Editor shown here:
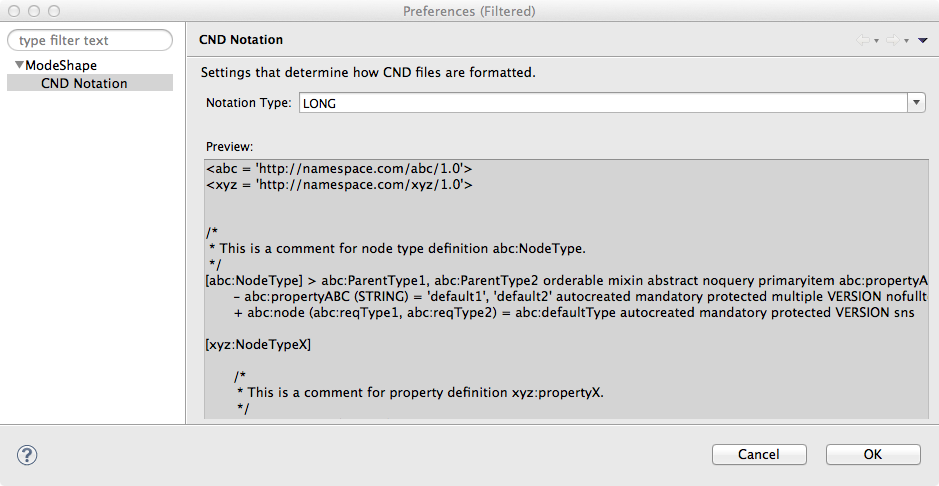
CND Preference Page
The CND Preference Page allows you to save CND files using the various CND notations available. The notation type determines the size and readability of the output.
Here is what the CND Preference Page looks like:
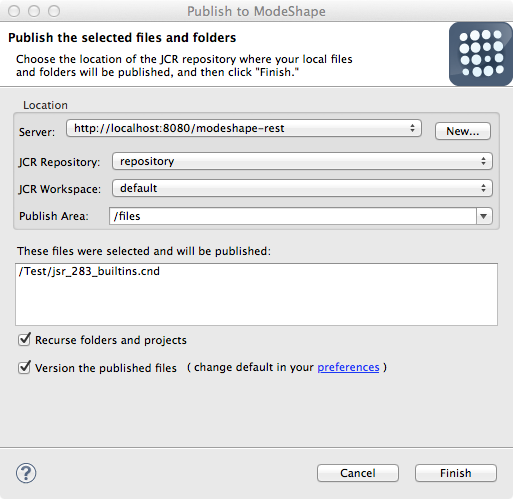
ModeShape publishing tool
The publishing feature provides a way to upload files from your Eclipse workspace to a ModeShape repository. The Publishing Dialog uses the files and directories selected in the workspace as the resources which will be used in the publishing operation.
Here is what the Publishing Dialog looks like:
When a project or folder is selected, all their included files are published. You can use the Ignored Resources Preference Page to identify resources that should always be excluded from publishing operations.
Here is a what the Ignored Resources Preference Page looks like: 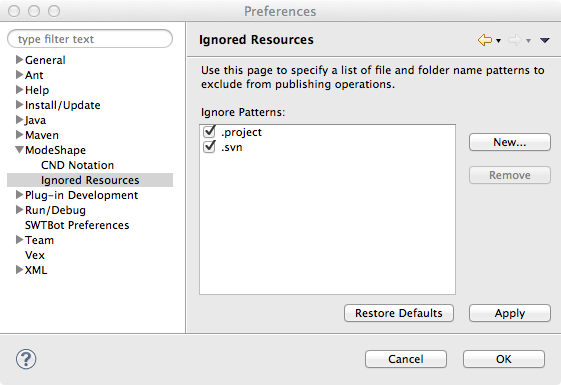
The publishing dialog can also be used to delete, or unpublish, files from ModeShape repository workspaces. Just select ModeShape -> Unpublish context menu item when opening the publishing dialog.
Installation
Each of these features can be installed separately or together by following these steps:
1. Start up Eclipse 3.7 (Juno), then do: Help > Install New Software...
2. Copy the following site's URL "http://download.jboss.org/jbosstools/updates/stable/kepler/integration-stack/modeshape/" into Eclipse, and hit Enter.
3. When the site loads, select the features to install, or click the Select All button.
4. Click Next, agree to the license terms, and install.
Want to help?
Let us know what you think of these plugins. If you have questions, suggestions, or think you've found a bug, contact us on our discussion forum or on IRC. We also welcome anyone that wants to help contribute code, too.
The ModeShape Eclipse tools has its own JIRA and its own Git repository. Have a look at the code, and even fork it on GitHub.